
The Ultimate Guide to Download Ledger Live for Windows

Have you ever felt overwhelmed by the thou ght of managing your cryptocurrency assets? I know I have. That's why I was thrilled when I discovered Ledger Live – a game-changing solution for secure crypto management. But here's the catch: getting started can be a bit tricky, especially if you're not tech-savvy.
I remember the first time I tried to download Ledger Live for Windows and install it on my PC. It felt like navigating a maze blindfolded! But don't worry, I've been there, done that, and now I'm here to guide you through the process. In this ultimate guide, I'll walk you through every single step of installing Ledger Live download desktop, from understanding what it is to troubleshooting common issues. By the end of this post, you'll be a Ledger Live pro, ready to take control of your crypto assets with confidence.
So, are you ready to embark on this crypto journey with me? Let's dive in and explore the world of Ledger Live download app, starting with understanding what it is and why it's a must-have for any serious crypto enthusiast.
Understanding Ledger Live
What is Ledger Live?
As a cryptocurrency enthusiast and longtime user of hardware wallets, I can confidently say that Ledger Live download app is a game-changer in the world of digital asset management. It's an all-in-one companion application designed to work seamlessly with Ledger Live for Mac and Windows hardware wallets. I've found it to be an indispensable tool for managing my crypto portfolio.
Download Ledger Live desktop to serve as a bridge between your Ledger device and the blockchain networks of various cryptocurrencies. It allows me to view my balances, send and receive transactions, and manage my digital assets all from one intuitive interface. What I appreciate most about download Ledger Live Windows is that it keeps my private keys secure on my hardware wallet while providing a user-friendly software experience.
Benefits of using Ledger Live
In my experience, Ledger Live offers several compelling advantages:
-
Unified management: I can manage multiple cryptocurrencies from a single application, which saves me time and reduces complexity.
-
Real-time balance updates: My portfolio value is always up-to-date, giving me a clear picture of my holdings.
-
Secure transactions: I can initiate transactions on Ledger Live download update, but they require physical confirmation on my Ledger device, enhancing security.
-
Easy updates: The app notifies me about firmware updates for my Ledger device, ensuring I always have the latest security features.
-
Built-in exchange: I can swap cryptocurrencies directly within the app, which is incredibly convenient.
One of the standout features that I've come to rely on is the ability to install and manage various cryptocurrency apps on my Ledger device directly through Ledger Live update download. This flexibility allows me to adapt my wallet to my changing portfolio needs without compromising security.
Compatibility with Windows operating systems
As a Windows user, I'm pleased to say that download Ledger Live Windows is fully compatible with modern Windows operating systems. Here's what you need to know about running download Ledger Live desktop on Windows:
-
Supported versions: Ledger Live works smoothly on Windows 8.1 and Windows 10. I've personally tested it on Windows 10 and can vouch for its performance.
-
System requirements: The application doesn't demand much from your system. A 64-bit processor, 4 GB of RAM, and about 100 MB of free disk space are typically sufficient.
-
Installation process: Downloading and installing Ledger Live on Windows is straightforward. I'll guide you through this process in detail in the upcoming sections.
It's worth noting that while download Ledger Live Mac is available for download on Windows, it's also compatible with how to download Ledger Live on MacBook and Linux. This cross-platform support ensures that regardless of your operating system preference, you can enjoy the benefits of Ledger Live download signatures.
Now that we've covered what Ledger Live download app is, its benefits, and its compatibility with Windows, let's move on to preparing for the installation process. I'll walk you through the steps to ensure a smooth setup experience.
Preparing for Installation
System requirements
Before I dive into the installation process, it's crucial to ensure your Windows system meets the necessary requirements for running download Ledger Live Windows smoothly. I've found that having the right setup can save you a lot of headaches down the line.
For optimal performance, your Windows PC should have:
-
Windows 8.1 or later (64-bit)
-
An Intel Pentium 4 processor or later that's SSE2 capable
-
4 GB of RAM (8 GB recommended)
-
At least 1 GB of free disk space
I always recommend updating your operating system to the latest version to ensure compatibility and security. It's also a good idea to close any unnecessary programs before starting the installation to free up system resources.
Downloading the official Ledger Live software
Now that I've confirmed my system meets the requirements, it's time to download Ledger Live app. I always make sure to download directly from the official Ledger website to avoid any potential security risks.
Here's how I do it:
-
I open my preferred web browser and navigate to Ledger's website.
-
On the homepage, I look for the "Downloads" section or a "Get started" button.
-
I select "Download Ledger Live for Windows" to start the download.
For Mac users, you can also download Ledger Live for Mac or Ledger Live Mac download from the same section.
It's important to note that the file size is usually around 100 MB, so depending on your internet speed, it might take a few minutes to complete.
Verifying the authenticity of the download
Security is paramount when dealing with cryptocurrency software, so I always take the extra step to verify the authenticity of download Ledger Live desktop. This process helps ensure that the file hasn't been tampered with and is genuinely from Ledger.
To verify the download:
-
I locate the downloaded file, usually in my "Downloads" folder.
-
I right-click on the file and select "Properties."
-
In the Properties window, I click on the "Digital Signatures" tab.
-
I check that the signer is listed as "Ledger SAS" and that the signature is valid.
Additionally, Ledger provides a verification tool on their website. I use this to double-check the file's integrity by comparing the checksum of my downloaded file with the one provided by Ledger.
If you're experiencing Ledger Live download update stuck, it's a good idea to re-download the file and verify its integrity again.
By following these steps, I can confidently proceed with the installation, knowing that I have the correct and secure version of download Ledger Live desktop. With the preparation complete, I'm now ready to move on to the actual installation process, which I'll cover in detail in the next section.
Step-by-Step Installation Process

Running the installer
Now that we've prepared our system, let's dive into the installation process. I'll guide you through each step to ensure a smooth installation of Ledger Live on your Windows computer.
To begin, I'll navigate to the official Ledger website and download Ledger Live app for Windows. Once the download is complete, I'll locate the installer file in my Downloads folder and double-click it to run.
A security prompt may appear, asking if I want to allow the app to make changes to my device. I'll click 'Yes' to proceed. The installer will then launch, and I'll be greeted with the setup wizard.
Choosing installation location
Next, I'll be prompted to choose where I want to install download Ledger Live desktop. By default, it's usually set to install in the Program Files folder. I prefer to keep it in the default location for easy management, but if you have a specific preference, you can choose a different folder.
Here's a quick list of considerations when choosing the installation location:
-
Available disk space
-
Ease of access for future updates
-
System performance (installing on an SSD can improve load times)
After selecting the location, I'll click 'Next' to continue.
Configuring initial settings
Now, I'm at the initial settings configuration stage. Here, I can customize a few options to tailor download Ledger Live Windows to my preferences. Some of the settings I can adjust include:
-
Language selection
-
Automatic updates
-
Usage data sharing (for improving the app)
I always make sure to read through each option carefully before making my selections. Once I'm satisfied with my choices, I'll click 'Next' to proceed.
Creating a new wallet or importing existing accounts
The final step in the installation process is deciding whether to create a new wallet or import existing accounts. If I'm a new user, I'll choose to create a new wallet. This option will guide me through the process of setting up my Ledger device and creating a new set of accounts.
If I'm an existing user transferring from another device or recovering my accounts, I'll select the option to import existing accounts. This process typically involves using my recovery phrase to restore my wallet.
If you're wondering how to download Ledger Live on Chromebook, currently, the app isn't directly supported, but you may be able to run it using a Linux environment on your Chromebook.
Whichever option I choose, Ledger Live will provide clear instructions to follow. It's crucial to take my time during this step and ensure all information is entered correctly.
By following these steps, I've successfully installed Ledger Live Windows download on my computer. The process is straightforward, but it's important to pay attention to each step to ensure everything is set up correctly.
With Ledger Live download app now installed, I'm ready to connect my hardware wallet and start managing my cryptocurrencies securely.
Setting Up Your Ledger Device
Connecting your Ledger hardware wallet
Now that we've successfully installed Ledger Live download desktop on our Windows computer, it's time to set up our Ledger device. I'll guide you through the process of connecting your hardware wallet to Ledger Live manager download, ensuring a secure and seamless experience.
First, I'll walk you through the steps to connect your Ledger device:
-
Unbox your Ledger hardware wallet
-
Connect it to your computer using the provided USB cable
-
Press both buttons on the device to turn it on
-
Follow the on-screen instructions to set up your PIN code
Once your device is connected and powered on, Ledger Live should automatically detect it. If it doesn't, I recommend checking the USB connection and ensuring that your device is properly recognized by your computer.
Installing device firmware updates
Keeping your Ledger device's firmware up-to-date is crucial for maintaining optimal security and functionality. Here's how I make sure my device is running the latest firmware:
-
Open Ledger Live and navigate to the "Manager" tab
-
Click on the device icon in the left sidebar
-
If an update is available, you'll see a notification
-
Click "Install" and follow the on-screen instructions
During the update process, it's important not to disconnect your device or close download Ledger Live Windows. The update might take a few minutes, but it's a small price to pay for enhanced security and new features.
Enabling developer mode (if necessary)
In some cases, you might need to enable developer mode on your Ledger device. This is typically required for advanced users or when working with certain cryptocurrencies. Here's how I enable developer mode:
-
Go to "Settings" on your Ledger device
-
Navigate to "Security"
-
Select "Developer mode"
-
Choose "Enable" and confirm your choice
It's important to note that enabling developer mode should only be done if you're absolutely certain you need it. For most users, the standard setup is sufficient.
With your Ledger device now connected, updated, and configured, we're ready to explore the Ledger Live interface and start managing our digital assets securely. In the next section, I'll guide you through the various features and functionalities of Ledger Live, helping you make the most of this powerful cryptocurrency management tool.
Navigating the Ledger Live Interface

Dashboard overview
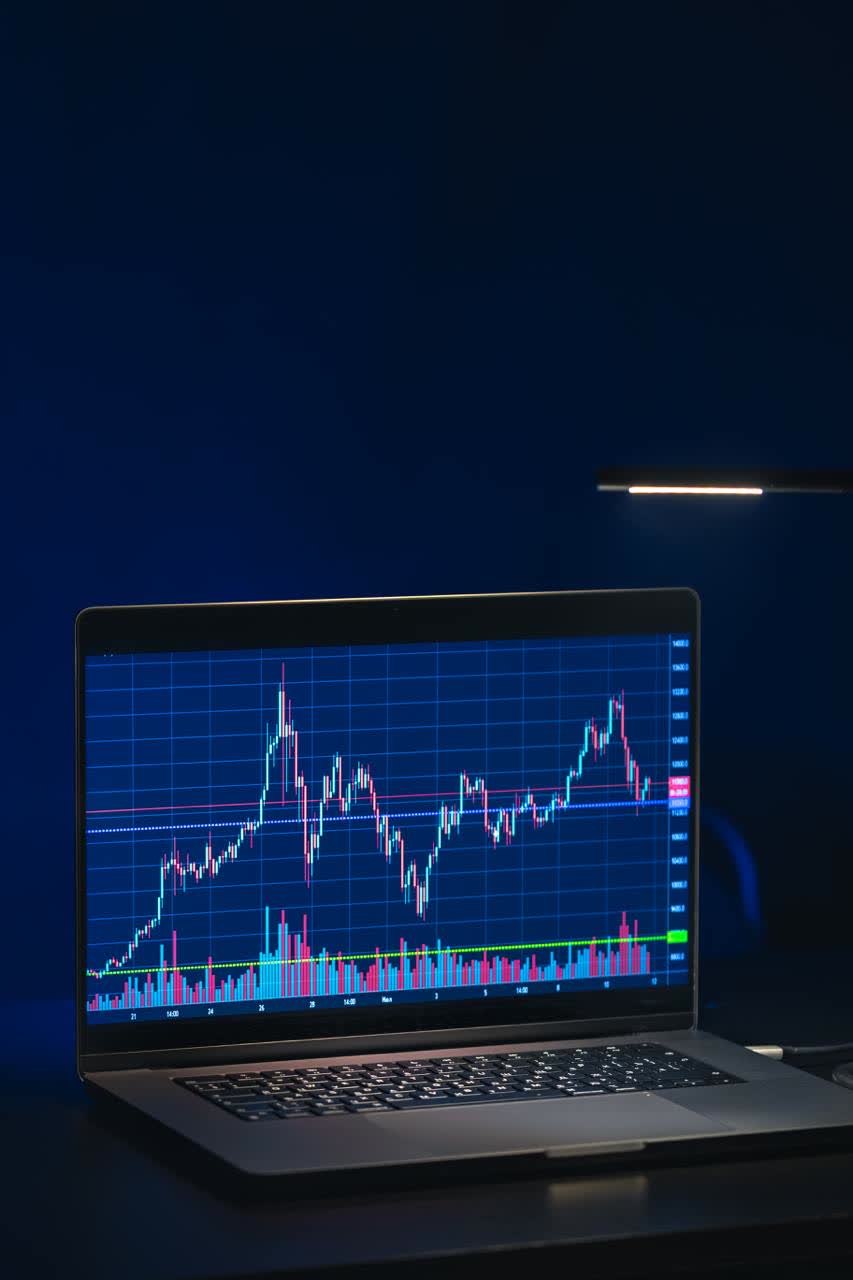
When I open Ledger Live download app, I'm greeted by a sleek and intuitive dashboard that gives me a comprehensive overview of my crypto portfolio. The dashboard is the central hub where I can quickly access all the essential information about my assets.
At the top, I see my total portfolio balance, which updates in real-time. This feature allows me to keep track of my overall wealth at a glance. Below that, there's a graph showing my portfolio's performance over time, which I find incredibly useful for tracking my investment growth.
On the left side of the dashboard, I have a sidebar menu that provides quick access to different sections of the app, including my accounts, send/receive functions, and settings.
Adding and managing accounts
One of the most important features I use in download Ledger Live desktop is the ability to add and manage multiple accounts. To add a new account, I simply click on the "Add Account" button in the sidebar. From there, I can choose the cryptocurrency I want to add and follow the prompts to set up the account.
Managing my accounts is equally straightforward. I can:
-
View individual account balances
-
Check transaction history for each account
-
Rename accounts for better organization
-
Hide accounts I don't use frequently
-
Archive old accounts I no longer need
This level of account management helps me keep my crypto assets organized and easily accessible.
Viewing portfolio and transaction history
The portfolio view in Ledger Live download Windows is one of my favorite features. It provides a detailed breakdown of my assets, showing:
-
The distribution of my portfolio by cryptocurrency
-
Current market prices for each asset
-
The total value of each holding
-
Percentage changes over different time periods
As for transaction history, I can easily access a complete log of all my transactions across all accounts. This feature is invaluable for tracking my spending, receiving, and trading activities. I can filter transactions by date, type, or account, making it simple to find specific entries when I need them.
Accessing settings and preferences
Now that we've covered the main features, let's look at how I customize my Ledger Live experience through the settings and preferences. In the settings menu, I can:
-
Change the app's display currency
-
Adjust security settings, such as enabling a password lock
-
Manage my connected devices
-
Choose which price providers to use for market data
-
Set up developer mode for advanced features
These settings allow me to tailor Ledger Live to my specific needs and preferences, ensuring I have the best possible experience while managing my crypto assets.
Troubleshooting Common Installation Issues
USB connection problems
When installing Ledger Live download Windows, one of the most common issues I've encountered is USB connection problems. These can be frustrating, but I've found several ways to troubleshoot them effectively.
First, I always make sure to use the original USB cable that came with my Ledger device. Third-party cables can sometimes cause connectivity issues. If I'm still having problems, I try different USB ports on my computer. I've noticed that some ports, especially those on the front of desktop computers, may not provide enough power.
Here's a quick checklist I go through when facing USB connection problems:
-
Check if the device is recognized in Windows Device Manager
-
Ensure the Ledger device is unlocked and on the dashboard
-
Try a different USB cable
-
Use a USB port directly on the computer, not through a hub
-
Restart both the Ledger device and the computer
Driver installation errors
Another hurdle I sometimes face is driver installation errors. These can prevent Windows from recognizing my Ledger Live download app properly. To resolve this, I make sure I have the latest Windows updates installed, as these often include important driver updates.
If I'm still encountering issues, I manually update the drivers. I go to the Device Manager, find my Ledger device (it might be under "Unknown devices"), right-click, and select "Update driver." I then choose to search automatically for updated driver software.
Firewall and antivirus conflicts
I've learned that firewall and antivirus software can sometimes interfere with Ledger Live's installation or operation. To address this, I temporarily disable my antivirus and firewall during the installation process. However, I always remember to re-enable them once the installation is complete.
If I'm still experiencing issues after re-enabling my security software, I add Ledger Live to the list of allowed applications in both my firewall and antivirus settings. This ensures that Ledger Live can communicate freely with my device and the Ledger servers.
Syncing difficulties
Syncing problems can be particularly annoying when setting up Ledger Live. If I'm having trouble syncing my accounts, I first check my internet connection to ensure it's stable. Then, I verify that my computer's date and time settings are correct, as incorrect settings can cause syncing issues.
If syncing is still a problem, I clear the Ledger Live cache. To do this, I go to Settings > Help > Clear Cache. After clearing the cache, I restart Ledger Live and attempt to sync again.
Sometimes, syncing issues are due to network congestion on Ledger's servers. In these cases, I've found that patience is key. I wait a while and try again later, and usually, the problem resolves itself.
By following these troubleshooting steps, I've been able to overcome most common installation issues with download Ledger Live Windows. Now that we've covered these common problems and their solutions, let's look at how we can enhance the security and privacy of our Ledger Live setup.
Enhancing Security and Privacy
Enabling two-factor authentication
Now that you've set up Ledger Live download Windows, it's crucial to enhance its security. I always recommend enabling two-factor authentication (2FA) as the first step. This adds an extra layer of protection to your account, making it significantly harder for unauthorized users to gain access.
To enable 2FA in Ledger Live:
-
Open the Ledger Live application
-
Navigate to the Settings menu
-
Select the 'Security' tab
-
Look for the '2FA' option and toggle it on
-
Follow the prompts to set up your preferred 2FA method (usually via a mobile authenticator app)
Remember, once 2FA is enabled, you'll need both your password and a temporary code to log in. This might seem like an extra step, but I assure you, it's worth the added security for your crypto assets.
Configuring privacy settings
Next, I always take some time to review and adjust the privacy settings in Ledger Live download Windows. By default, the app collects some data to improve user experience, but you have control over what information you share.
Here's how I customize my privacy settings:
-
Go to the Settings menu
-
Select the 'General' tab
-
Scroll down to 'Analytics'
-
Choose which data you're comfortable sharing (if any)
I personally opt out of most data sharing options, but the choice is yours. Remember, the less information you share, the more private your crypto activities remain.
Best practices for safeguarding your crypto assets
Beyond the built-in features of Ledger Live, I follow several best practices to ensure the utmost security for my crypto assets:
-
Regular updates: I always keep Ledger Live and my device firmware up-to-date. These updates often include crucial security patches.
-
Secure environment: I only use Ledger Live on a trusted, malware-free computer. I never access my wallet on public Wi-Fi or shared devices.
-
Backup recovery phrase: I've securely stored my 24-word recovery phrase in multiple safe locations. This is crucial for recovering my assets if my device is lost or damaged.
-
Verify transactions: Before confirming any transaction, I double-check the details on both Ledger Live and my hardware device's screen.
-
Use passphrase: For an extra layer of security, I've set up a passphrase (sometimes called the "25th word") on my Ledger device.
Installing Ledger Live download Windows is a straightforward process that can greatly enhance your cryptocurrency management experience. By following the steps outlined in this guide, you'll be able to set up Ledger Live mac download, connect your hardware wallet, and securely manage your digital assets. Remember to always prioritize security by keeping your device updated, using strong passwords, and following best practices for cryptocurrency storage.
For Mac users, Ledger Live download for Mac offers the same powerful features and security as the Windows version, ensuring a seamless experience for managing crypto assets. If you're using Ledger Live mac download, take full advantage of its intuitive interface and enhanced security settings. Whether you're tracking your portfolio or executing transactions, this tool is designed to optimize your crypto management on macOS.
If you encounter any issues during the setup process, don't hesitate to consult the troubleshooting section or reach out to Ledger's support team. With Ledger Live mac download installed on your Mac, you're now ready to take control of your digital assets with confidence and peace of mind.
FAQ
How can I download the Ledger Live app on my desktop?
To get Ledger Live on your desktop, simply visit the official Ledger website and select the appropriate version for your operating system—whether Windows, Mac, or Linux. Once downloaded, launch the installer and follow the setup guide to start managing your crypto assets securely.
Can I install Ledger Live on my Mac?
Yes, Ledger Live is fully compatible with macOS! Head over to the Ledger website, choose the Mac version, and download the app. After downloading, just follow the installation steps to begin managing your Ledger device on your Mac.
What’s the process for downloading Ledger Live on Windows?
To install Ledger Live on Windows, download the installer from the Ledger website. Ensure you select the Windows version. Once the file is downloaded, open the installer and follow the on-screen steps to get the app up and running.
How to get the latest Ledger Live update?
Updating Ledger Live is simple. When an update is available, the app will notify you. Just click "Download update" when prompted, and the latest version will install. If the update gets stuck, try restarting your app or reinstalling it for a fresh start.
Can I download Ledger Live for Chromebook?
Ledger Live doesn’t natively support Chromebooks, but there’s a workaround. You can enable Linux on your Chromebook and then download and install the Linux version of Ledger Live to manage your crypto securely.